
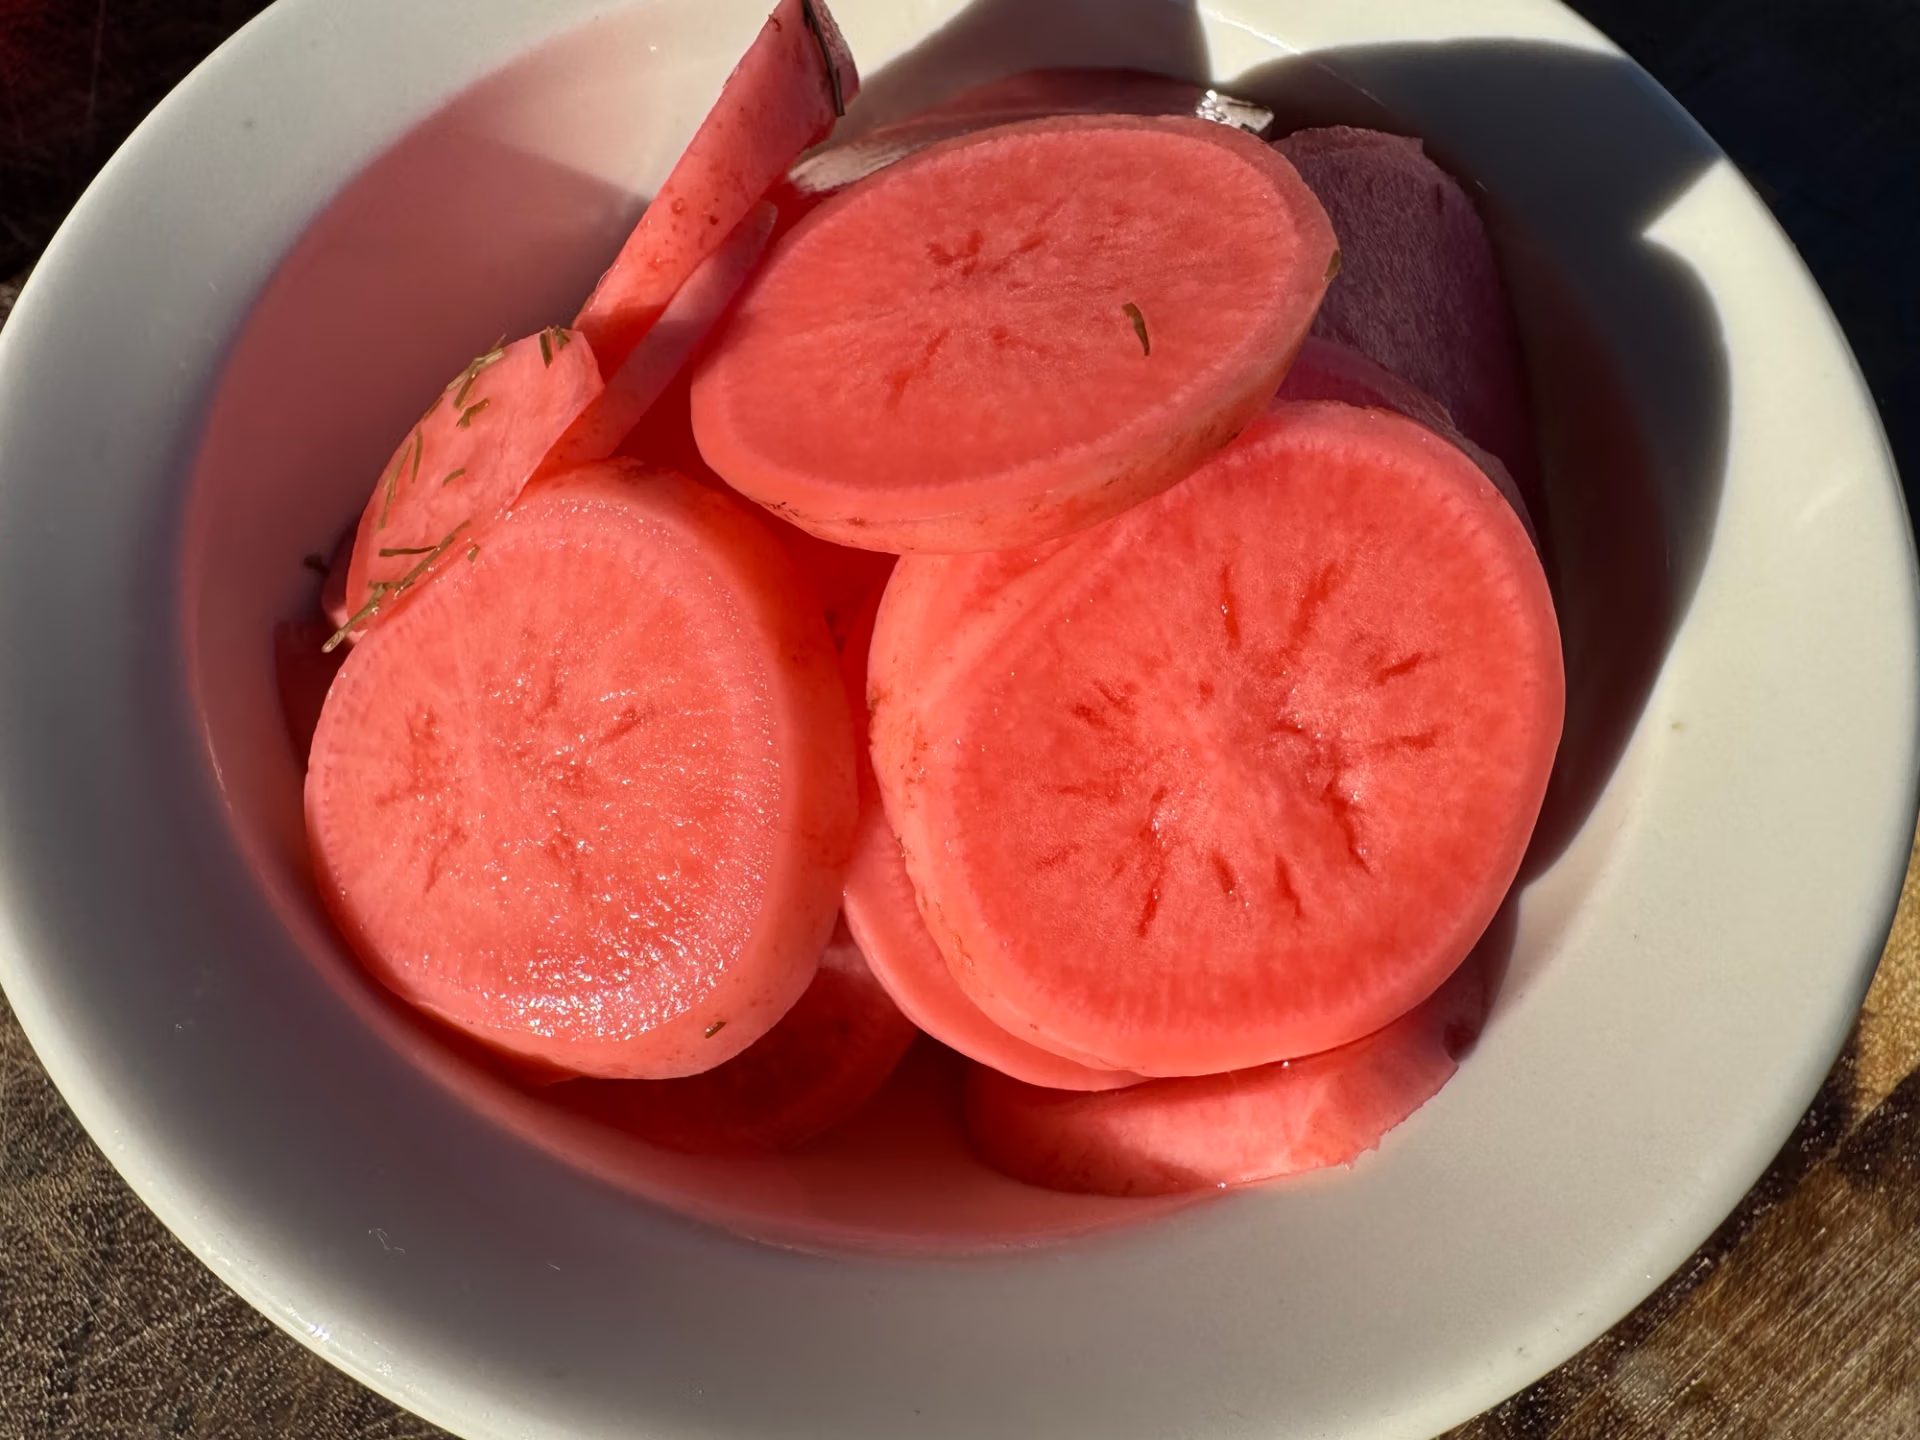
If there’s one thing my family expects me to make every single week these days, it’s a jar of quick-pickled radishes. It started as one of those “let me just use up what’s in my fridge” experiments, and now? My toddler literally says “Yum Yum!” every time she sees them on her plate. My husband is so obsessed that if the jar is empty, he looks at me like someone forgot to pay the light bill. 😄
And honestly? I don’t blame them. Quick pickled radishes add this bright pop of flavor and color to almost anything — salads, sandwiches, rice bowls, tacos, and even my cozy rabbit pie (which is my forever favorite rustic dish). A crisp radish slice on top of a savory bite just perks up every flavor around it.
Why You’ll Love These Quick Pickled Radishes
There’s something kind of magical about a quick pickle. You take something as plain as a radish—peppery and crunchy—and within an hour or two it’s transformed into something pink and tangy with a perfect salty-sweet balance. Plus:

- They’re super easy to make.
- They add that crisp, bright bite to rich or heavy foods.
- The color is gorgeous, making any dish look photo-ready.
- They’ll last up to 2 weeks in the fridge.
You can play around with flavors (spicy, herby, garlicky — go wild!).
And the best part? Even my daughter loves them. She literally eats them like candy. Watching a toddler say “Yum Yum” for a radish is hands-down one of my proudest mom-chef moments. 🥰
Ingredient Breakdown
Here’s what you’ll need for these quick pickled radishes — and don’t worry, most of this is pantry-friendly.
Radishes – The star of the show. Use red radishes for that gorgeous color, but rainbow or watermelon radishes are also amazing. Thinly slice them for that perfect texture.
Vinegar – White vinegar is my go-to for a clean, sharp flavor. Apple cider vinegar also works if you want a touch more sweetness.
Water – Cuts the vinegar’s sharpness so the pickles are balanced.
Sugar – Brings out the sweetness of the radishes and mellows the vinegar’s tang.
Salt – Essential for flavor and drawing out some of the radishes’ moisture.
Optional Add-Ins
- Garlic cloves — for savory depth.
- Mustard seeds & Peppercorns — add a subtle spice.
- Red pepper flakes or jalapeño slices — for heat.
- Fresh herbs like dill or thyme — to add fragrant green notes.
You can tailor this to your taste, and if you end up like me, making them every week, you’ll probably want to experiment. One batch with thyme and mustard seeds; another with extra red pepper flakes for a kick — they all disappear just as fast.
How to Make Quick Pickled Radishes
Here’s my step-by-step process. This is one of my easiest recipes — no canning, no fuss.
1. Slice the radishes.
Wash and trim your radishes, then slice them as thinly as you can manage — a mandoline slicer is great if you have one. Thin slices mean they pickle faster and look so pretty.
2. Pack the jar.
Add the sliced radishes into a clean pint-size jar. Drop in any optional flavor additions like garlic or spices at this stage too.
3. Make the brine.
In a small saucepan, combine vinegar, water, sugar, and salt. Warm over medium heat just until the sugar and salt dissolve — there’s no need to boil. Stir and remove from heat.
4. Pour over the radishes.
Carefully pour the warm brine into the jar, making sure the radishes are fully submerged. Give the jar a gentle tap or use a spoon to help release any bubbles.
5. Cool & refrigerate.
Allow the jar to come to room temperature, then seal and pop it in the fridge. They’ll be tasty after an hour, but overnight is even better. Trust me — the next day they’re perfect.

Storage Tips
Quick pickled radishes will keep up to 2 weeks in the fridge. They stay crisp and flavorful for days. If you want to reuse the brine, strain it into a clean saucepan, add a bit more vinegar and sugar if it seems too weak, heat to dissolve, and pour it over new veggies. It’s a thrifty and tasty cycle!
Ways to Use These Quick Pickled Radishes
If you can resist just grabbing them straight from the jar (guilty!), there are so many ways to enjoy your quick pickled radishes:
- In salads — Adds zing to leafy green salads or even pasta salads.
- On sandwiches & burgers — Cuts through rich flavors with that bright crunch.
- With tacos & nachos — Perfect for balancing fatty meats and cheese.
- In rice or grain bowls — Gives you texture and a vinegar hit alongside cooked veggies and protein.
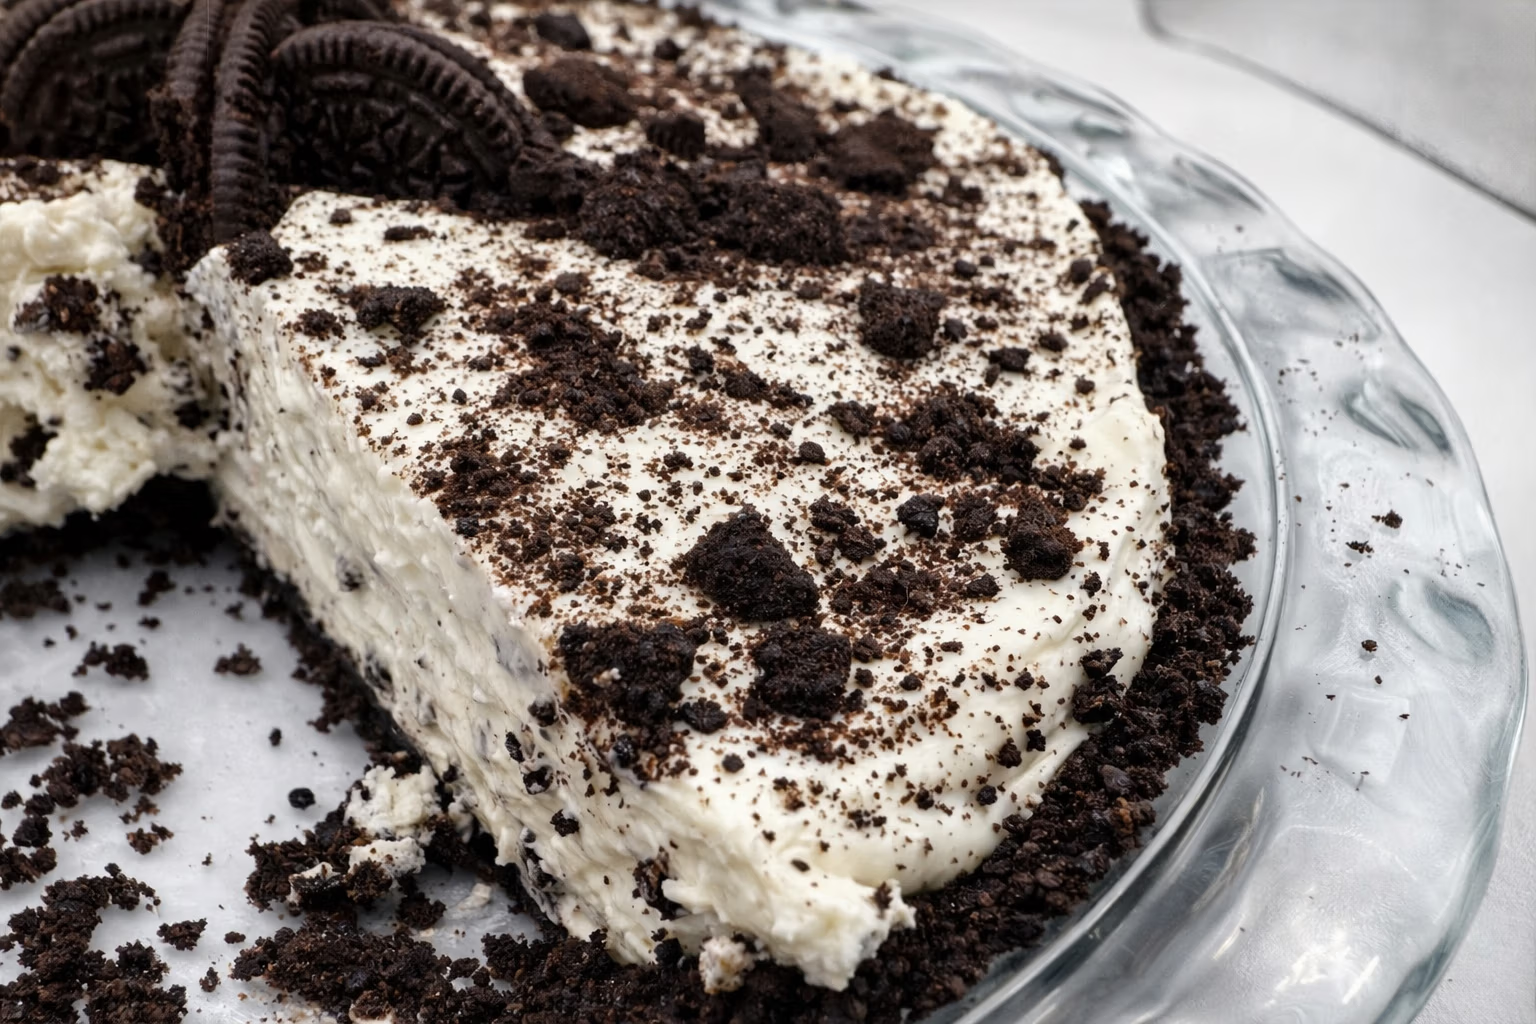
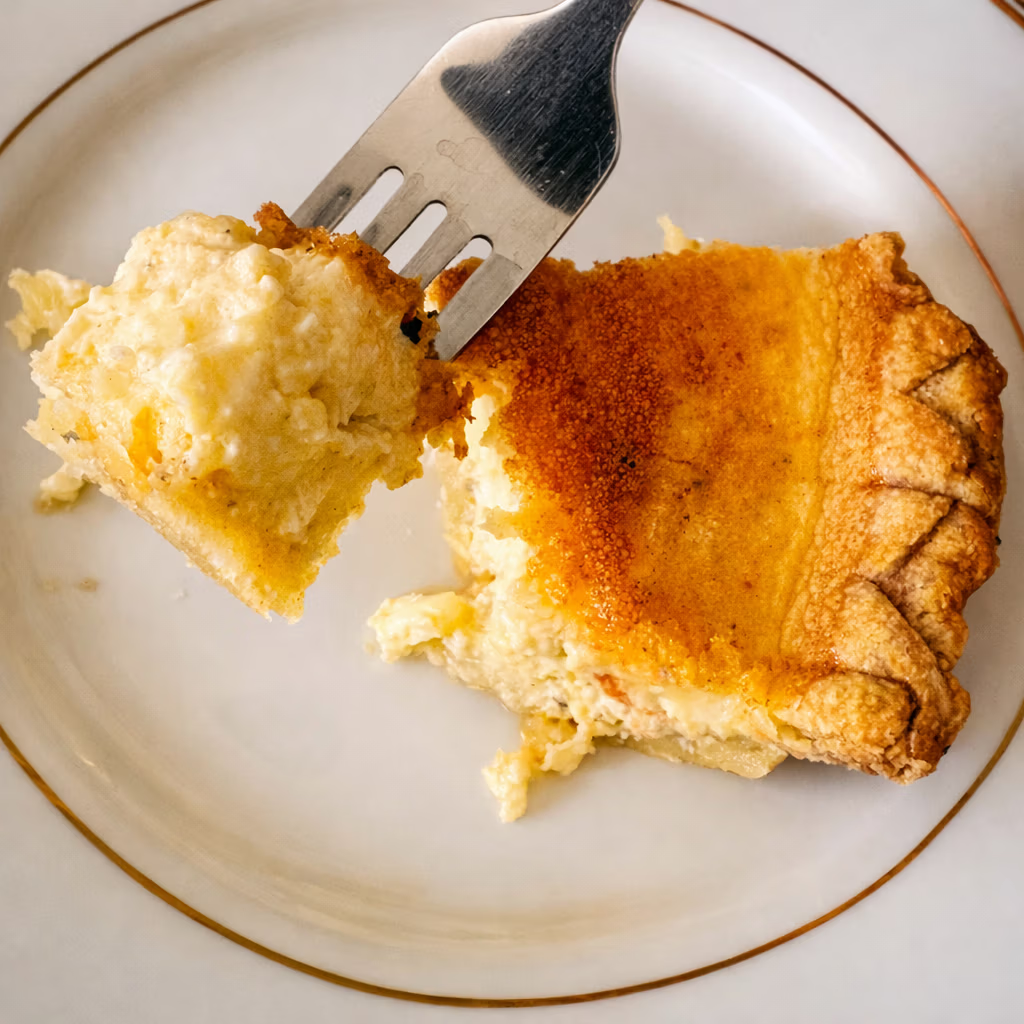
- On top of savory pies — I especially love these with my rabbit pie; their tangy crisp is just chef’s kiss.
- With charcuterie & cheese boards — Think of these like tiny jewels for snacking!
Family Love & Camille’s Weekly Pickle Routine
Every week — and I mean every week — my husband asks, “Do we have pickled radishes?” It’s become a ritual as comforting as my morning coffee. My daughter loves reaching into the fridge to snag one or two and always chimes in with a big, satisfied “Yum Yum!”
Honestly, making these quick pickled radishes feels like one of those small but mighty mom-wins. They take 10 minutes to put together and keep my family smiling all week long. It also means I’m constantly playing with new flavors — garlic-dill one week, red pepper-spicy the next — and every version is gone before I know it.
And because I already had leftover brine one day (thanks to this addiction), I decided to branch out into other quick-pickled goodness. That’s when my Pickled Apples and Onions experiment was born — another favorite that’s equally snackable and perfect for sandwiches. (Stay tuned for that blog post; it’s coming very soon. 🤩)
Related Recipes
Quick pickles are the gateway to so much tasty creativity. Check out these other recipes to round out your plate:
Jamaican Escovitch Fish – Hear me out! This is a Pickled meal! You will love it! Pickled fish smothered in pickled veggies!
Cottage Pie or Rabbit Pie — You will be delighted with the tang that these radishes add to a meat and potato dish. (You’re Welcome)
If you’re looking for more recipes like these, make sure you’re subscribed — just fill out my easy form here — so you never miss a tasty update. 💌
Ready to Pickle Along With Me?
Quick pickled radishes are one of those tiny joys that elevate every meal. I hope they become as much of a staple in your kitchen as they are in mine. Let me know if you give them a try — I’d love to hear your favorite way to use them. And if you’re feeling extra generous, you can always support me with a cup of coffee at Buy Me a Coffee. Every bit of support fuels my recipes and my passion for sharing these tasty kitchen stories with you.
Happy pickling, friends!
With love and a big, crunchy bite,
— Camille 💜

Quick Pickled Radishes
4
servings10
minutes20
minutes30
minutesThese quick-pickled radishes are crunchy, tangy, and just the right amount of spicy (if you want them to be). Perfect on tacos, rice bowls, avocado toast, or straight out the jar like the spicy snack they are.
Keep the screen of your device on
Ingredients
1 bunch radishes (about 8–10), thinly sliced
1/2 cup white vinegar
1/2 cup water
1½ tablespoons sugar
¼ teaspoons kosher salt
- Optional Add-ins (mix & match)
1 small garlic clove, smashed
1/2 teaspoon mustard seeds
1/4 teaspoon black peppercorns
1/4 teaspoon crushed red pepper flakes
2-3 sprigs fresh dill or thyme
1 thin slice of jalapeño or dried chili (for heat)
Directions
- Prep the radishes: Wash and trim the radishes. Slice them thinly—either by hand or with a mandoline slicer.
- Fill your jar: Pack the sliced radishes into a clean 16-ounce (pint) jar. Add any flavorings you like—garlic, herbs, chili, etc.
- Make the brine: In a small saucepan, combine vinegar, water, sugar, and salt. Heat gently over medium heat, stirring until the sugar and salt are fully dissolved (do not boil).
- Pour the brine: Carefully pour the hot brine over the radishes in the jar, making sure they’re fully submerged. Use a spoon to gently press them down and remove air bubbles if needed.
- Cool and chill: Let the jar cool at room temperature (about 20 minutes), then seal and refrigerate. They’ll turn a beautiful pink and be ready to eat in as little as 1 hour.
Did you make this recipe?
Tag @camilles_comforting_cuisine on Instagram and hashtag it with
Like this recipe?
Follow camillescomfortingcuisine on Pinterest
Check Out My Latest Recipes
