
I made cheesecake because I’ve been craving cheesecake. That grown-and-sexy kind of craving that has nothing to do with your kids, your calendar, or a bake sale. Just because I wanted something creamy, rich, a little indulgent—and unapologetically mine. My daughter? She’s in daycare. She doesn’t understand cheesecake. And if she did, I don’t want her to. I don’t get many meals to myself these days, but this? This was a quiet moment in the kitchen that turned into the best little treat I’ve made in a long while.
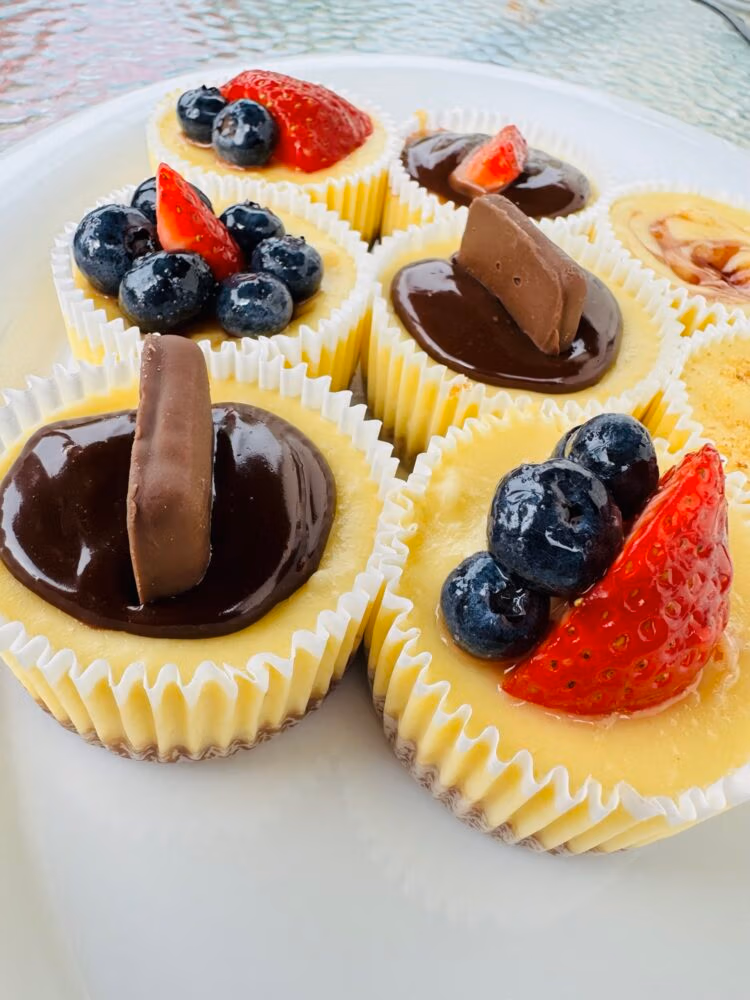
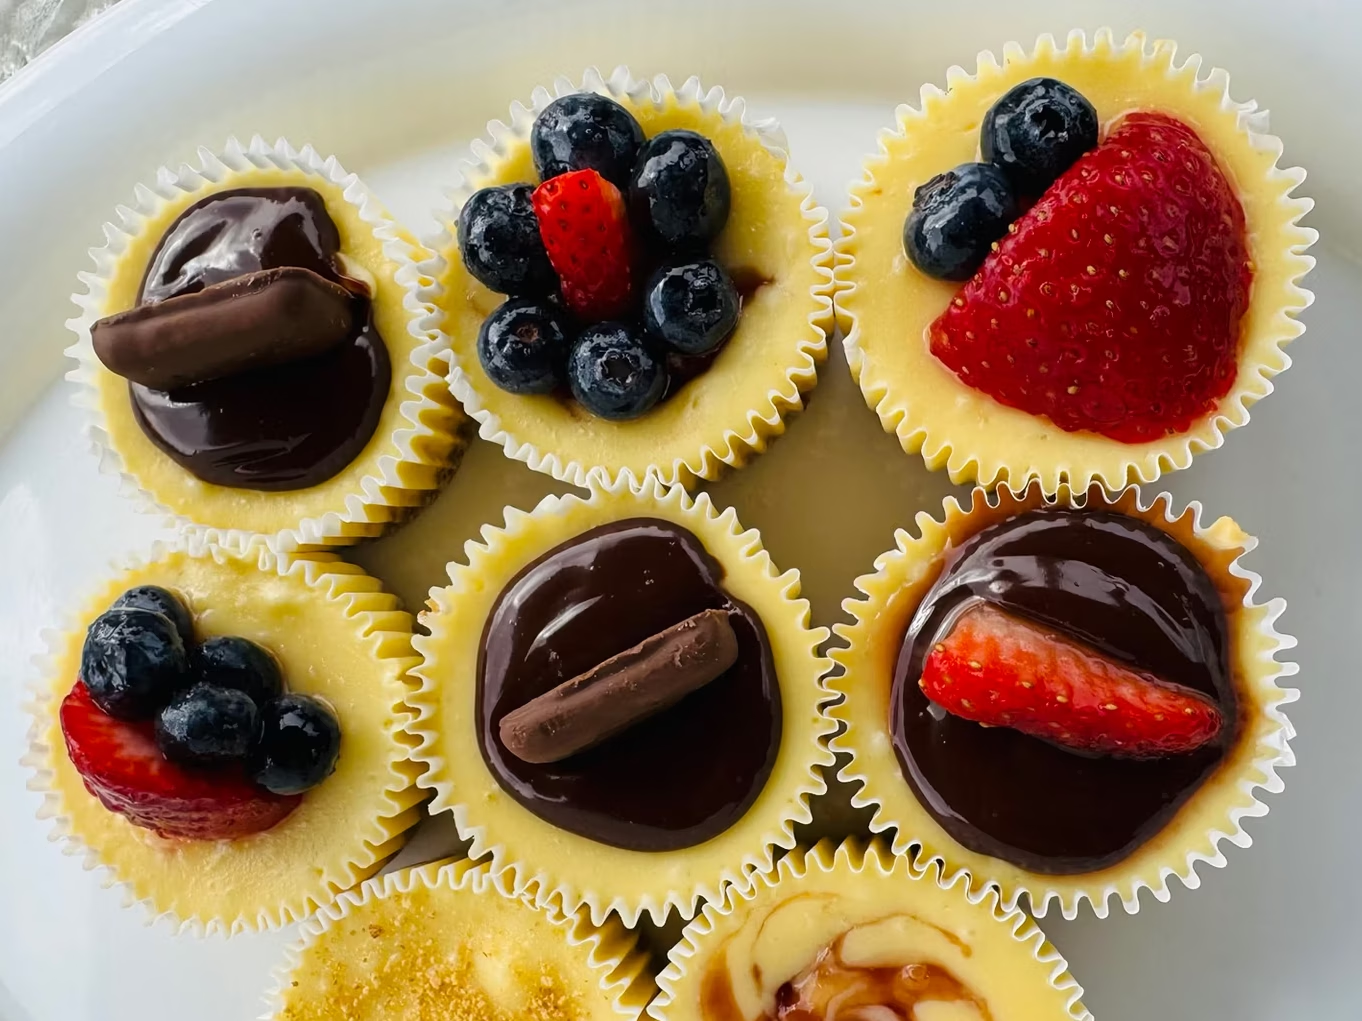
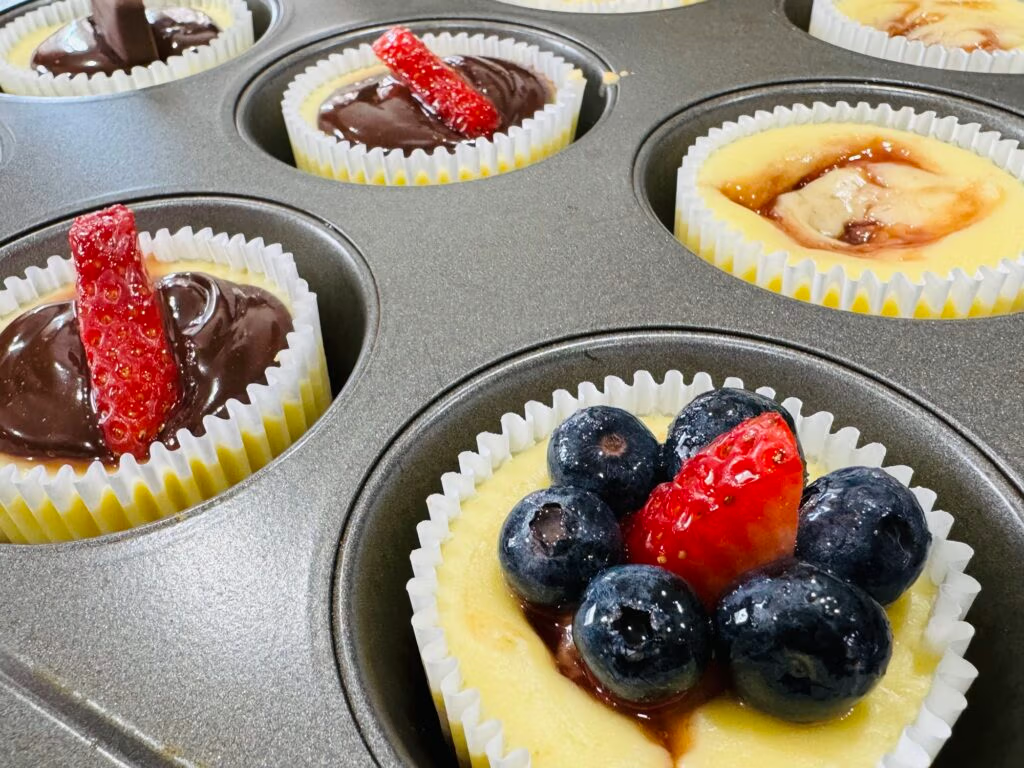
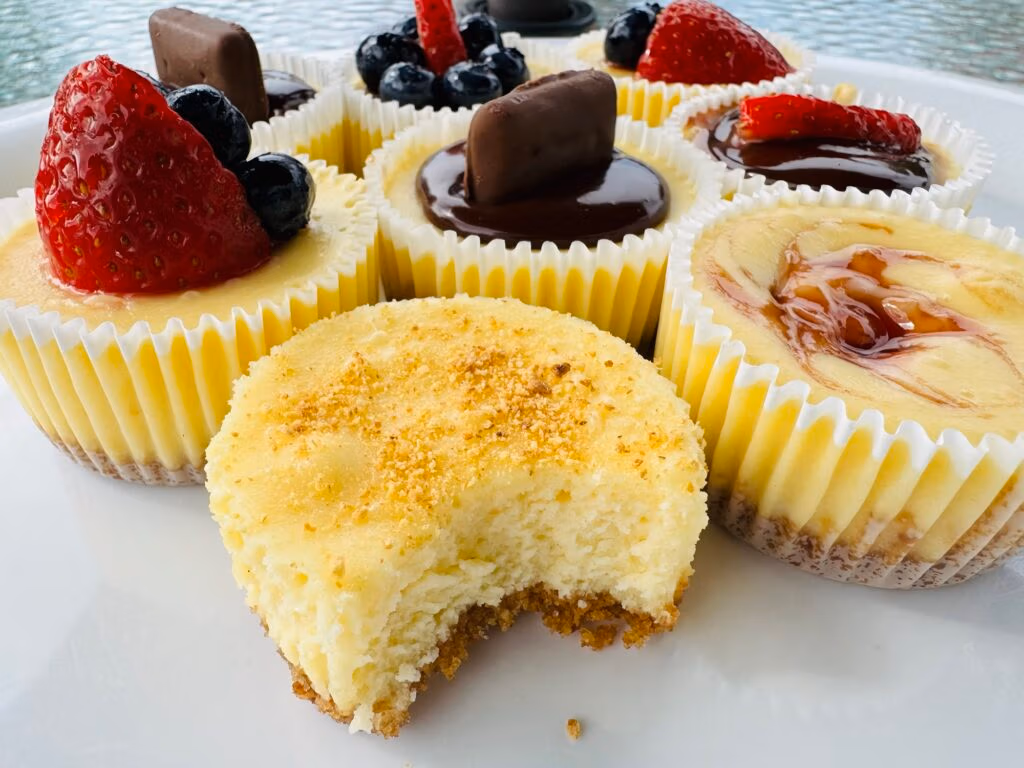
So I started early in the morning, right after drop-off, and whipped up a dozen of these cupcake-sized mini cheesecake bites. And let me tell you—they were perfect. I made some with a chocolate topping and dipped a graham cracker cookie. A few got a swirl of strawberry jam. Others? Naked and chilled, waiting for a drizzle of homemade caramel later. I tasted them all. Because why not?
And then, after dinner—an oven-braised pot roast I’ll link below—I snuck back into the fridge. Quietly. Carefully. Like a cheesecake ninja. And I had just one more. Just one.
Why Mini Cheesecake Bites Deserve Their Own Moment
These little cheesecake cupcakes (or mini cheesecake cups, depending on what you call them) are all about:
- Portion Control, but Make It Luxurious: No need to slice or measure. These are bite-sized desserts you can indulge in without overthinking it.
- Customization Heaven: Top them with chocolate, caramel, berries, crushed Oreos, peanut butter chips, jam—you name it.
- Party-Worthy & Kid-Optional: They’re elegant enough for showers and grown-up dinners, but your kids will still ask for one.
- Quick Bake & Chill: Under 20 minutes in the oven. Chill while you handle dinner. Serve after bedtime.
- Perfect for Make-Ahead Moments: These store beautifully, travel well, and taste even better the next day.
I’ve served these at brunches, gifted them in mini treat boxes, and yes—one of these is 100% making an appearance at the baby shower I’m throwing soon for someone I love.
The Craving That Sparked This Recipe
Let’s be real: cheesecake isn’t typically a weekday dessert. But it should be especially when you can make these mini cheesecake bites with graham cracker crust in under 45 minutes total. You don’t even need to break out the stand mixer.
That morning, I had just one full brick of cream cheese and a second that was missing about two tablespoons. I had Graham cracker crumbs (the crushed ones in the box), and Greek yogurt in the fridge. That was enough.
If you don’t have the pre-crushed graham crackers, just blitz whole crackers in your food processor or smash them with a rolling pin inside a baggie. You can even add a pinch of cinnamon or brown sugar to the crust if you want a flavor twist.
The cheesecake filling comes together in minutes. Cream cheese, sugar, eggs, vanilla, and just a bit of yogurt or sour cream to stretch and smooth it out. That’s it. Spoon it into liners over your buttery graham crust, bake it up, and chill it while you go live your life (or make Instant Pot Curry Chicken, because that’s what I did that night).
Mini Cheesecake Bites Recipe
You’ll need:
- Cream cheese
- Sugar
- Vanilla
- Eggs
- Greek yogurt or sour cream
- Graham cracker crumbs
- Melted butter
- Cupcake liners + muffin tin
Optional toppings:
- Chocolate sauce, jam, fresh fruit, crushed cookies, or homemade caramel (recipe here)
Steps:
- Make and press your crust
- Mix your filling
- Fill the cups and bake (about 18 minutes)
- Chill for at least 1 hour
- Top right before serving
Don’t skip that last part: add fruit toppings only on the day you serve. Berries can release moisture overnight, and no one wants a soggy cheesecake.
How I’m Serving These Cheesecake Bites For a Crowd
My dear friend (yes, you know who you are) loves cheesecake, but not chocolate. So for her baby shower, I’m planning a brunch and dessert spread with:
- Bacon Egg and Cheese Crescent Rolls
- My Epic Berry Trifle dessert
- Pull-apart Monkey Bread for nostalgia
- Coffee Cake for the grownups
- Egg Soufflé/ Egg Bites, these are decadent and perfectly portioned?
- Spinach and Egg Quiche or a very hearty and pleasing Cowboy Quiche. Try the with my Savory Homemade Pie Crust!
- Marshmallow Fruit Salad for color and whimsy
- Apple Cranberry Walnut Salad and Cobb Salad to balance it out
- Baked Feta and Chickpeas served with warm pita is an impressive plate for any occasion.
You can do this too. Use this mini cheesecake bites recipe as your anchor and build a full dessert bar or brunch spread around it.
Flavor Variations That Keep Things Interesting
- Mini cheesecake with caramel sauce
- Mini cheesecake with vanilla wafer crust
- Mini cheesecake with fruit topping (jam, berries, or compote)
- Easy mini cheesecakes with crushed cookie base
- Mini cheesecakes with peanut butter swirl
- Cupcake size cheesecake with lemon zest & blueberry
These are all valid. Try them. Mix and match. Or go rogue.
FAQ: Cheesecake Bites 101
How to make cheesecake bites without cracking?
Don’t overmix the batter after adding the eggs, and avoid overbaking. Look for a slight jiggle.
How long do mini cheesecake cups last?
4–5 days in the fridge. Best enjoyed within 48 hours for peak texture.
Can I freeze these mini cheesecakes?
Yes. Freeze without toppings. Thaw in the fridge overnight before serving.
Can I use store-bought crust or shells?
You can! But the homemade graham cracker crust takes only 5 minutes.
Can I make mini cheesecake with vanilla wafer crusts?
Yes—just drop a whole wafer in each liner instead of pressing a crust.
Can I double or triple this recipe?
Absolutely. It scales easily for parties.
Is this the best mini cheesecake recipe?
I think so. The texture, the size, the simplicity? It wins every time.
What toppings are best for cheesecake bites?
Chocolate drizzle, jam swirl, berries, crushed cookies, caramel, whipped cream… whatever you love.
Can I use low-fat cream cheese?
You can, but it won’t be as rich or creamy. Full-fat gives the best results.
Before You Go…
If you make these cheesecake bites, I’d love to see them! Tag me on social media, leave a comment, or share a photo. What variation did you make? Did you raid the fridge after bedtime like I did?
Don’t forget to subscribe! When you sign up, you’ll instantly get my free printable kitchen duo — a Meat Thermometer Temperature Guide and a Kitchen Ingredient Substitution Chart.
Want to support the blog and help me keep testing desserts while my toddler is at school?
Buy Me a Coffee ☕
With love, crumbs, and cheesecake forks,
—Camille ♥

MINI CHEESECAKE BITES
12
servings15
minutes18
minutes33
minutesCreamy, rich, and shockingly simple, these mini cheesecake bites come together with pantry staples, one block of cream cheese (plus a little yogurt), and zero stress. Dress them up with whatever toppings you have on hand—Oreos, berries, chocolate chips, or homemade caramel sauce. A perfect dessert for busy moms and little ones alike!
Keep the screen of your device on
Ingredients
- For the crust
1 cup graham cracker crumbs
2 tablespoons granulated sugar
4 tablespoons unsalted butter, melted
- For the filling
14 ounces cream cheese (1 full brick + ¾ of a second brick), softened
2 tablespoons plain Greek yogurt or sour cream
½ cup granulated sugar
1 teaspoon vanilla extract
2 large eggs
Directions
- Preheat the oven to 325°F. Line a 12-cup muffin tin with cupcake liners.
- In a small bowl, stir together graham cracker crumbs, granulated sugar, and melted butter until it looks like wet sand.
- Spoon about 1 heaping tablespoon of the crust mixture into each cupcake liner. Press it down firmly using your fingers or the bottom of a small glass.
- In a medium bowl, beat the cream cheese, Greek yogurt, and sugar until smooth and creamy. Add vanilla extract and mix to combine.
- Add eggs one at a time, mixing just until incorporated—do not overmix.
- Spoon the batter evenly into each liner, filling about ¾ of the way.
- For a swirl effect, add a small spoonful of warmed jam on top and swirl gently with a toothpick.
- Bake for 16–18 minutes, until the edges are set and the centers are slightly jiggly.
- Let the mixture cool in the pan for 10 minutes, then transfer it to the fridge and chill for at least 1 hour.
- Top with berries, Oreo crumbs, caramel sauce, chocolate chips, or whatever you love. Serve chilled.
Camille’s Notes
Did you make this recipe?
Tag @camilles_comforting_cuisine on Instagram and hashtag it with
Like this recipe?
Follow camillescomfortingcuisine on Pinterest
Check Out Our Latest Recipes
- No Bake Oreo Dream Cheesecake
 This Homemade Oreo Cheesecake recipe is a rich, creamy no bake dessert that keeps everything you love about Oreos and cheesecake perfectly balanced. The smooth cheesecake filling is infused with real Oreo crème for flavor. The chocolate cookie crust and topping add just the right amount of crunch. Each slice is thick, silky, and beautifully… Read more: No Bake Oreo Dream Cheesecake
 - An Easy Cheese Quiche Recipe You Will Make Again and Again
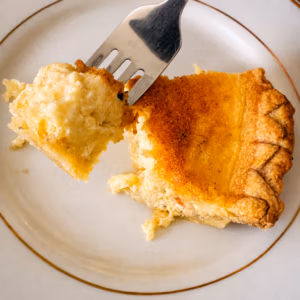 Creamy, rich, and surprisingly simple, this cheese quiche recipe is the kind of breakfast that feels elegant without requiring much effort. This three cheese quiche recipe is made with a frozen pie crust, a silky egg custard, and layers of melted cheese for a texture that feels downright luxurious. If you’ve ever wondered how to… Read more: An Easy Cheese Quiche Recipe You Will Make Again and Again
 - This Homemade Cheesecake is Better Than Storebought and So Easy!
 This easy cheesecake recipe with graham cracker crust is creamy, smooth, and beautifully simple, with no water bath required and no complicated steps. If you’ve ever wondered how to make a classic cheesecake that feels indulgent but approachable, this is the one to try. Soft, rich, and perfectly balanced, this simple homemade classic cheesecake recipe… Read more: This Homemade Cheesecake is Better Than Storebought and So Easy!
 - You Will Love This Easy Strawberry Shortcake Overnight Oats Recipe
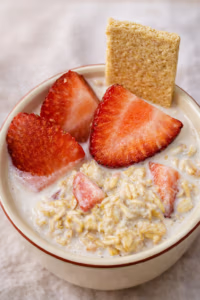 Some mornings call for coffee and quiet. Others demand something sweet enough to convince you to get out of bed at all. These strawberry shortcake overnight oats live somewhere perfectly in between — creamy, gently sweet, and layered with real strawberries and graham cracker crumble that make breakfast feel like dessert without tipping into indulgence… Read more: You Will Love This Easy Strawberry Shortcake Overnight Oats Recipe
 - Buffalo Chicken Dip Recipe
 If you’re searching for a crowd-pleasing appetizer that delivers bold flavor without complicated prep, this buffalo chicken dip recipe checks every box. This easy buffalo chicken dip recipe uses simple ingredients, comes together quickly, and bakes into a hot, creamy, irresistible dish that belongs on every game day table. In this post, you’ll learn exactly… Read more: Buffalo Chicken Dip Recipe
 - How to Make a Roasted Butternut Squash Soup with Apples
 There’s something magical about roasting butternut squash until it turns golden, sweet, and just a little caramelized. This roasted butternut squash soup with apple wraps all that goodness into one velvety, creamy bowl that feels like a hug from the inside out. If you’ve been craving a homemade butternut squash soup recipe that balances comfort,… Read more: How to Make a Roasted Butternut Squash Soup with Apples