
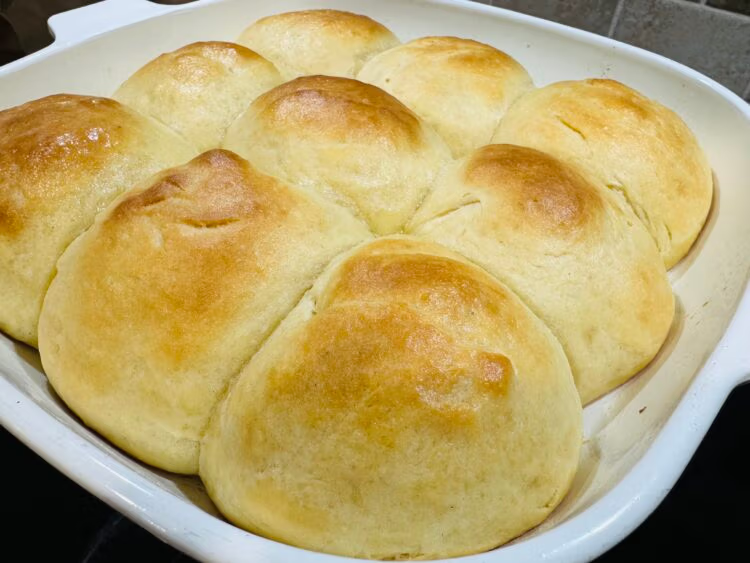
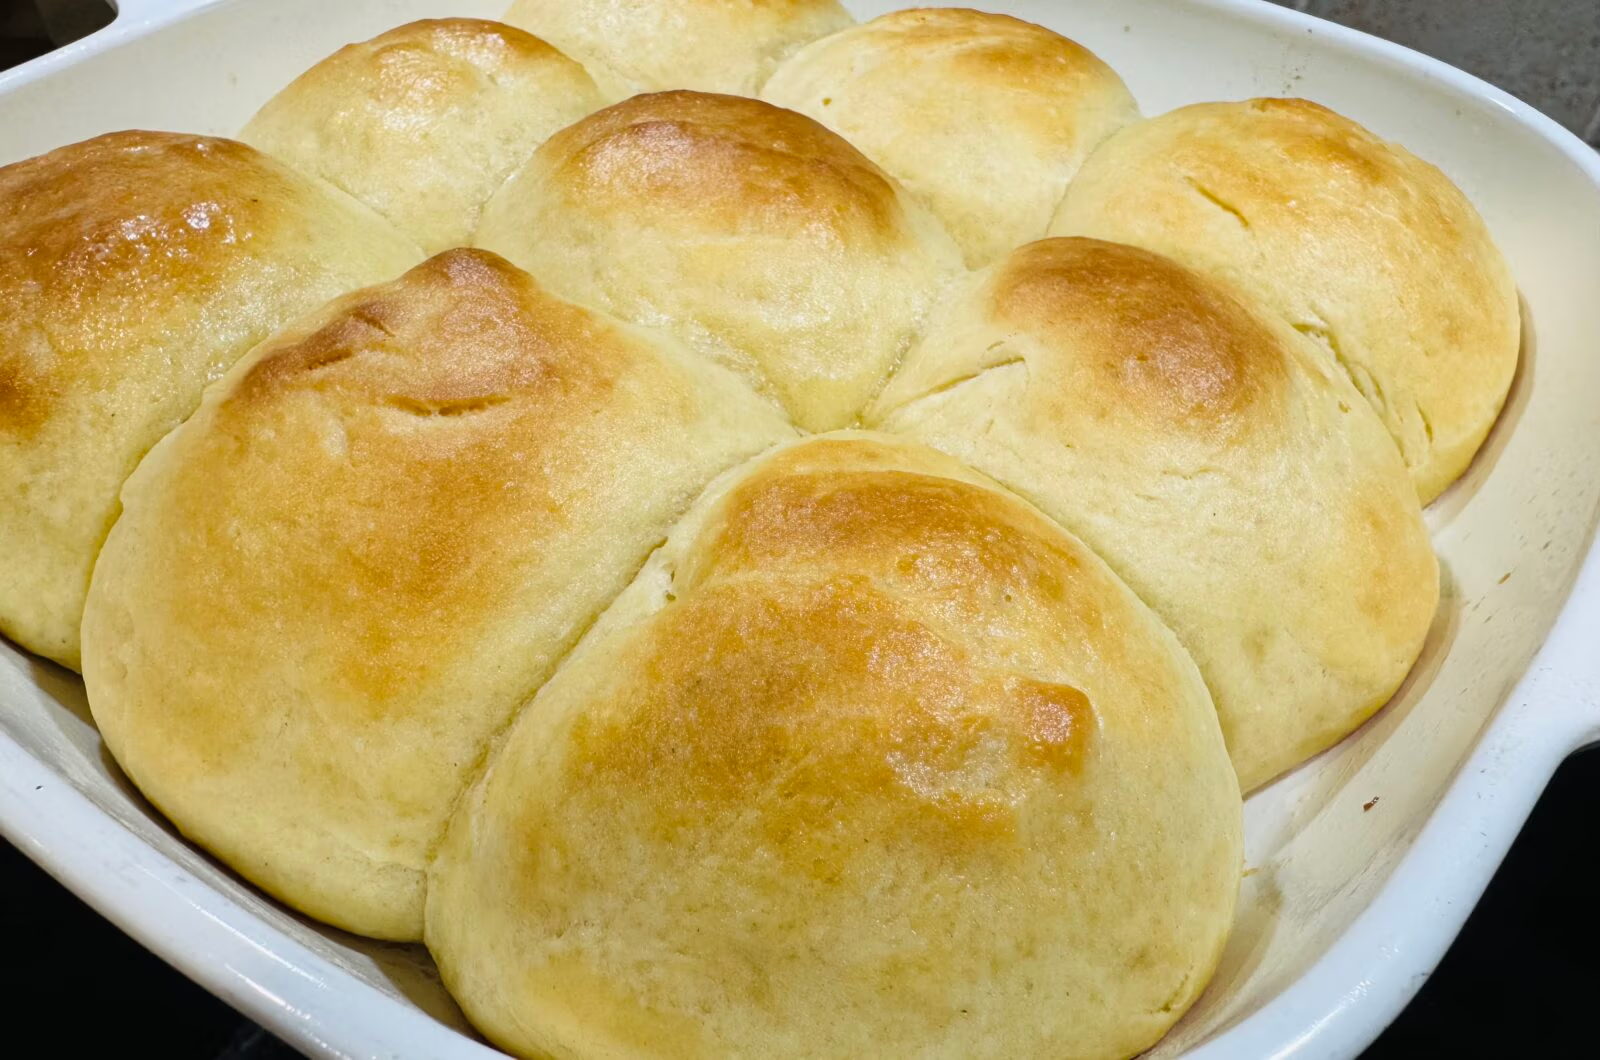
There’s something so comforting about the smell of fresh homemade bread drifting through the house. If you’re like me, you probably have a whole collection of recipes you pull out when you need to feed your soul as much as your belly. These homemade dinner rolls are that kind of recipe—soft, fluffy, golden, and kissed with melted butter.
When I first started baking bread from scratch, I read a helpful article on Food52 that gave some tips on making the perfect dinner rolls. Now, I had already been dabbling in baking, but the Food52 article gave approachable pointers that I now use in all my baking recipes. Once you see how approachable this recipe is—and taste how much better homemade dinner rolls are than any store-bought version—you’ll find excuses to make them on an ordinary Wednesday night.
These buttery dinner rolls have been my go-to for years. They’re simple enough for beginners but still special enough to earn a spot on your Thanksgiving or Sunday dinner table. Even if you’ve never made yeast bread, I promise you can pull this off—and I’ll walk you through every step.
Why You’ll Love These Homemade Dinner Rolls
1. The Softest Texture
Thanks to warm milk, a touch of sugar, and a bit of patience, these homemade dinner rolls bake up pillowy soft inside with a tender crumb.
2. All the Buttery Flavor
We’re not shy about butter around here—there’s butter in the dough, brushed over the tops before baking, and again when they’re fresh from the oven. It makes every bite rich and comforting.
3. Foolproof Process
You don’t need fancy equipment. A stand mixer makes kneading easier, but you can absolutely make these homemade dinner rolls by hand. Just plan time for the rises, and you’re golden.
4. Versatile and Crowd-Pleasing
Serve them with soups, roasts, stews, or use them to soak up gravy. These rolls are also amazing as little sandwiches stuffed with leftover turkey or pulled pork.
My Family Dinner Story
The night I made this batch, the kitchen was my little haven. My husband was in the living room watching Better Call Saul, which meant I had a full hour without anyone asking me for a snack. Our toddler was happily occupied on his lap instead of hanging off my legs, which, if you’re a parent, you know is basically a small miracle.
My oldest son, the recent graduate, was upstairs playing video games, and my youngest was in the basement (the man cave), completely absorbed in his own screen time. Everyone was tucked into their corners, doing their thing, and I finally had a little peace to get my hands in some dough.
That’s the thing I love about making homemade dinner rolls, yes, from scratch—it forces you to slow down. To be present. You can’t rush yeast, and you can’t rush good bread.
So I leaned into it. I measured the flour carefully, let the yeast bloom until it was foamy and fragrant, and shaped each roll by hand. The kitchen felt calm and warm, the only sounds the soft hum of the oven preheating and the occasional giggle from my daughter in the other room.
It was exactly the little moment of peace I needed.
What Makes These The Best Homemade Dinner Rolls?

The Milk
Warm milk is what gives these rolls their tender, almost creamy texture. It also activates the yeast beautifully.
The Butter
Softened butter goes into the dough, and melted butter goes on top before and after baking. It’s the difference between “good rolls” and “oh my God, I need another one.”
Simple Ingredients
Flour, sugar, yeast, milk, butter, egg, salt—nothing fancy, but together they make magic in these homemade dinner rolls.
Easy Technique
Two rises, one gentle punch-down, and shaping. If you can roll a ball of dough, you can make these rolls.
How to Make Buttery Dinner Rolls From Scratch
I’ve included the complete recipe card below this post, but here’s a little walkthrough to build your confidence before you get started.
- Activate the Yeast: Warm milk plus a bit of sugar and yeast. When it’s foamy, you know it’s alive and ready to make your rolls rise.
- Mix and Knead: You’ll add the flour, salt, egg, and softened butter. Mix until it comes together, then knead until the dough is smooth and elastic.
- First Rise: Let it rest in a warm place until doubled. This can take anywhere from 60–90 minutes, depending on your kitchen temperature.
- Shape: Punch down the dough, divide into nine equal pieces, and shape each into a ball. You don’t have to be perfect—rustic is beautiful.
- Second Rise: Let them puff up again. This is when they’ll get that signature soft texture.
- Bake and Butter: Bake until golden, then slather with more melted butter. This is my favorite part—shiny, buttery tops that make everyone’s mouth water.
Tips for Success
- Use Fresh Yeast: Always check the date on your yeast. If it doesn’t foam in the warm milk, toss it and start again.
- Don’t Rush the Rises: The dough needs time to develop flavor and texture.
- Soft Butter is Key: Room-temperature butter mixes into the dough more evenly.
- Use an Instant-Read Thermometer: If you’re unsure about your milk temperature, check it—it should be about 110°F.
- Make Ahead: You can shape the rolls, cover tightly, and refrigerate overnight. Let them come to room temperature before baking.

Ways to Serve These Homemade Dinner Rolls
These Homemade dinner rolls pair perfectly with soups, stews and chilis:
- Try my amazing Chili with a secret you will use again and again
- Dinner rolls dip perfectly into this Flavorful Slowcooker Pot Roast
- For a comforting vibe, definitely try this baked herby whole chicken
- Or if you need a little comfort for the soul, serve rolls with rotisserie chicken noodle soup
Frequently Asked Questions
Can I freeze these rolls?
Yes! Bake, cool completely, and freeze in a zip-top bag. Reheat in a 300°F oven until warmed through.
Can I double the recipe?
Absolutely. Use a 9×13 pan for 18 rolls and increase the baking time by a few minutes.
Can I use whole wheat flour?
You can replace up to half the flour with whole wheat, but the rolls will be a bit denser.
Final Thoughts
When you bake dinner rolls from scratch, you’re making more than bread. You’re making a memory. The smell that brings everyone into the kitchen. The warm roll you hand to someone you love. The bite you sneak before dinner is even served.
So, whether you’re making these buttery dinner rolls for a holiday or just because you want something soft and homemade on a weeknight, I hope they bring you the same little moment of peace they got me.
Happy baking, friend. May your kitchen be warm and your rolls always rise beautifully.
With love and butter,
Camille 💛
Homemade Soft Buttery Dinner Rolls
9
servings15
minutes15
minutes60
minutes1
hour30
minutesThese homemade dinner rolls are soft, fluffy, and brushed with rich melted butter for the ultimate comfort food side. Perfect for holiday spreads, Sunday dinners, or weeknight treats.
Keep the screen of your device on
Ingredients
1 cup warm whole milk (about 110°F)
2 1/4 teaspoons instant yeast (1 packet)
2 tablespoons granulated sugar
3 cups all-purpose flour (plus more as needed)
1 teaspoon salt
1 large egg
4 tablespoons unsalted butter, softened (plus more for brushing)
Directions
- In a large mixing bowl or stand mixer bowl, combine the warm milk, sugar, and yeast. Let it sit for 5–10 minutes until the mixture is foamy and bubbly on top.
- Add the egg, softened butter, salt, and 2 1/2 cups of flour to the yeast mixture. Mix until a sticky dough begins to form.
- Add the remaining 1/2 cup flour a little at a time, mixing until the dough pulls away from the sides of the bowl. If needed, add more flour 1 tablespoon at a time until the dough is soft but not sticky.
- Knead the dough by hand or with a dough hook for 8–10 minutes until it’s smooth, elastic, and bounces back when pressed with a finger.
- Place the dough in a lightly greased bowl, cover with a towel or plastic wrap, and let it rise in a warm place for 1 to 1 1/2 hours, or until doubled in size.
- Once risen, punch down the dough and turn it out onto a lightly floured surface. Divide the dough into 9 equal pieces.
- Shape each piece into a smooth ball by pulling the edges underneath and pinching the seam. Place the rolls into a greased 9-inch square baking pan or similar-sized dish.
- Cover loosely and let the rolls rise again for 30–45 minutes, or until puffy and touching.
- While the rolls rise, preheat the oven to 375°F.
- Once risen, brush the tops of the rolls with melted butter. Bake for 18–22 minutes or until the tops are golden brown and the rolls sound hollow when tapped.
- Remove from the oven and immediately brush with more melted butter for a glossy, flavorful finish.
- Let cool slightly before serving. Best enjoyed warm with extra butter.
Did you make this recipe?
Tag @camilles_comforting_cuisine on Instagram and hashtag it with
Like this recipe?
Follow camillescomfortingcuisine on Pinterest