

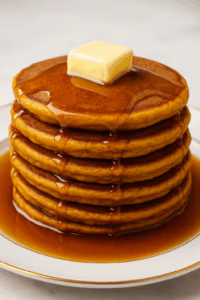
This peanut butter and jelly pancake bake is everything you love about a classic PB&J, transformed into a soft, creamy, oven-baked breakfast that feels cozy, nostalgic, and just a little bit special. It’s a kid-friendly breakfast recipe that skips the stovetop flipping and delivers big flavor in one simple tray bake. If you love easy baked breakfasts that make mornings calmer and sweeter, this one deserves a permanent spot in your rotation.
Why I Made This Peanut Butter and Jelly Pancake Bake
This peanut butter pancake bake honestly came from one of those moments where inspiration hits quietly and then refuses to leave you alone. A while back, I was watching a Netflix cooking show with Nadiya Hussain, and she made a peanut butter and jelly pancake tray bake. I didn’t pause the screen, I didn’t write anything down, and I definitely didn’t try to recreate her recipe step for step—but the idea stuck with me. A pancake bake. In a pan. With peanut butter and jelly swirled right in. Simple. Familiar. Genius.

Growing up, peanut butter and jelly was a staple. And if you were a kid in the era of Goober, you know exactly what I mean. That striped jar of peanut butter and jelly felt like luxury back then. My brother and I used to demolish that stuff. Somewhere along the way, I grew out of straight peanut butter sandwiches—but the flavor combination never stopped being comforting.
When I started testing this baked peanut butter and jelly pancake recipe, I wanted it to be creamy, not dry. That’s why this batter uses sour cream and warm milk. The result is a moist, tender pancake bake that almost eats like a soft breakfast custard in the center. It’s rich without being heavy, sweet without being overwhelming, and honestly… unexpectedly good.
The first time I made it, my daughter loved it. My niece loved it. Plates were cleared, and I knew immediately this wasn’t a one-time thing. Now it’s one of those recipes I reach for when I want breakfast to feel fun but still effortless. No flipping. No standing over the stove. Just pour, swirl, bake, and breathe.
Why You’ll Love This Baked Peanut Butter and Jelly Pancake Recipe
If you love kid friendly breakfast recipes that feel nostalgic but still work for real life, this baked peanut butter and jelly pancake recipe is for you. It hits that sweet spot between comforting and practical—especially if you’re cooking for kids, guests, or just yourself on a slow morning.
First, it’s incredibly easy. This PB&J pancake tray bake comes together in one bowl for the batter, a couple of mugs for warming the peanut butter and jelly, and one baking dish. There’s no flipping pancakes one by one, no worrying about hot spots on the skillet, and no standing at the stove while everyone else eats. You bake it once, slice it up, and you’re done.
Second, the texture is everything. Thanks to the sour cream, this pancake bake stays moist and soft even after cooling. The peanut butter melts into the batter, the jelly creates little pockets of sweetness, and every slice feels indulgent without being messy. It’s the kind of kid-friendly breakfast idea that adults genuinely enjoy too.
And finally, it’s flexible. You can make it for a weekend breakfast, a holiday brunch, or even prep it ahead for busy mornings. It feels special enough to serve to guests but familiar enough that kids don’t hesitate before taking a bite. If you’re looking for an easy baked PB&J pancake that actually delivers on flavor and texture, this one earns its place.
Ingredients

- 2 cups all-purpose flour
- 2 tablespoons sugar
- 2 teaspoons baking powder
- ½ teaspoon baking soda
- ½ teaspoon salt
- ¾ cup sour cream
- 1 cup whole milk, warmed
- 2 large eggs
- 4 tablespoons melted butter
- 1 tablespoon vegetable oil
- 1 teaspoon vanilla extract
- ½ cup creamy peanut butter, warmed
- ¼ cup grape jelly, warmed
- ¼ cup strawberry jelly, warmed
- Butter spray or baking spray for greasing
How to Make Peanut Butter and Jelly Pancake Bake
Time needed: 40 minutes
- Preheat and Prepare
Preheat your oven to 350°F. Grease a 9×13-inch baking dish generously with butter spray and set aside.
- Mix the Dry Ingredients
In a large bowl, whisk together the flour, sugar, baking powder, baking soda, and salt until evenly combined.
- Combine the Wet Ingredients
In a separate bowl, mix the sour cream, warmed milk, eggs, melted butter, vegetable oil, and vanilla extract until smooth.
- Create the Batter
Pour the wet ingredients into the dry ingredients and stir gently just until combined. The batter should be thick, creamy, and lump-free. Do not overmix.
- Fill the Pan
Pour the batter into the prepared baking dish and spread it evenly to the edges.
- Add the Peanut Butter and Jelly
Warm the peanut butter and jellies until pourable. Drop spoonfuls of peanut butter, grape jelly, and strawberry jelly evenly across the surface of the batter.
- Swirl Gently
Use a butter knife or skewer to gently swirl the toppings into the batter, creating a marbled effect without fully mixing them in.
- Bake
Bake for 24–28 minutes, checking around the 22-minute mark. The top should be puffed and lightly golden, and a toothpick inserted near the center should come out with moist crumbs.
- Cool and Serve
Let the pancake bake cool for 10–15 minutes before slicing. Serve warm or at room temperature.
Pairings
This peanut butter and jelly pancake bake pairs beautifully with simple sides that balance its richness. Try serving it with crispy bacon or breakfast sausage, fresh fruit salad, scrambled eggs, yogurt parfaits, or a glass of cold milk or hot coffee for a complete breakfast spread.
For a full breakfast or brunch spread try any of these:
- You Will Love This Decadant Fluffy Egg Souffle
- This Croque Monsieur is The Easy French Hot Ham and Cheese Sandwhich
- This is the Best Coffee Cake Recipe for Breakfast and Brunch
- This Recipe For Sour Cream Pancakes is Moist Fluffy and Delicious
- Perfect Bacon Spinach and Cheese Quiche
PB&J Baked Pancake FAQ
Yes. Prepare the boxed mix according to package directions, then swirl in the peanut butter and jelly before baking.
Absolutely. You can use all grape, all strawberry, or any jelly your family prefers.
Yes. This baked peanut butter and jelly pancake is soft, familiar, and very popular with kids.
Yes. This pancake bake stores and reheats well, making it great for meal prep.
Storage, Make-Ahead, and Reheating Instructions
Refrigeration: Store leftover baked peanut butter and jelly pancake slices in an airtight container in the refrigerator for up to 4 days. This PB&J pancake bake stays moist thanks to the sour cream in the batter, making it ideal for storing without drying out.

Make-Ahead: This baked peanut butter and jelly pancake recipe is perfect for make-ahead breakfasts. You can bake the entire tray the night before, allow it to cool completely, then cover tightly with foil or plastic wrap and refrigerate overnight. In the morning, simply slice and reheat for an easy, kid-friendly breakfast with zero prep.
Freezing: To freeze, slice the pancake bake into individual portions and wrap each slice tightly in plastic wrap, then place in a freezer-safe bag or container. Freeze for up to 2 months. Freezing individual slices makes this peanut butter pancake bake easy to grab for quick breakfasts or snacks.
Reheating: Reheat individual slices in the microwave for 20–30 seconds until warmed through. For a firmer texture, reheat slices in a 300°F oven for about 8–10 minutes. Frozen slices can be reheated directly from the freezer—just add an extra 15–20 seconds in the microwave.
Tip: Serve reheated slices with a drizzle of warm jelly or a little extra peanut butter if you want to refresh the flavors.
Final Thoughts
What I love most about this PB&J pancake tray bake is how flexible it is. It works beautifully as a kid-friendly breakfast recipe, but it’s just as perfect for slow weekends, sleepovers, or mornings when you want something homemade that still feels easy. It reheats well, stores beautifully, and honestly tastes just as good the next day—which is exactly what busy mornings need. If you grew up loving peanut butter and jelly sandwiches, this baked peanut butter and jelly pancake feels like a warm little nod to childhood, just upgraded for real life.
If you try this recipe, I’d love to hear how your family enjoyed it—leave a comment or rating below so other readers can see how it worked for you. And if recipes like this fit your life right now, be sure to subscribe to the blog so you don’t miss new, practical, comfort-driven recipes delivered straight to your inbox (plus subscriber-only extras). If you’d like to support the site, you can also Buy Me a Coffee—every little bit helps keep these recipes coming, and I appreciate it more than you know.
Here’s to easy mornings, full plates, and breakfast that feels like a hug.
— Camille

Peanut Butter and Jelly Pancake Tray Bake
6
servings15
minutes25
minutes40
minutesFluffy sheet-pan pancakes swirled with peanut butter and jam—a playful, family-friendly breakfast bake.
Keep the screen of your device on
Ingredients
2 cups all-purpose flour
2 tablespoons sugar
2 teaspoons baking powder
½ baking soda
½ salt
¾ cup sour cream
1 cup whole milk, warmed
2 large eggs
4 tablespoons melted butter
1 tablespoon vegetable oil
1 teaspoon vanilla extract
½ creamy peanut butter, warmed
¼ cup grape jelly, warmed
¼ cup strawberry jelly, warmed
Pam butter spray for greasing the pan or dish
Directions
- Preheat your oven to 350°F and spray a 9×13-inch baking dish with Pam butter spray.
- In a large bowl, whisk together the flour, sugar, baking powder, baking soda, and salt.
- In a separate bowl, mix the sour cream, warmed milk, eggs, melted butter, vegetable oil, and vanilla extract until smooth.
- Pour the wet ingredients into the dry ingredients and stir just until combined. The batter should be thick and creamy—don’t overmix.
- Pour the batter into the greased baking dish and spread it evenly to the edges.
- Warm the peanut butter and both jellies until smooth and pourable. Drop dollops of peanut butter, grape jelly, and strawberry jelly across the surface of the batter.
- Use a butter knife or skewer to gently swirl the toppings into the batter, creating a marbled look without fully mixing them in.
- Bake for 24 to 28 minutes, checking at 22. The top should be puffed and golden, and a toothpick inserted near the center should come out with moist crumbs but no wet batter.
- Let cool for 10–15 minutes before slicing. Serve warm or at room temperature.
Camille’s Notes
- You will need to use more or less of the peanut butter and jellies based on the size of your dish and the pattern or design you decide to pour. Have fun!
- When using your knife or skewer to draw your lines, remember to place the tip of your tool all the way to the bottom of your pan or dish before moving.
Did you make this recipe?
Tag @camilles_comforting_cuisine on Instagram and hashtag it with
Like this recipe?
Follow camillescomfortingcuisine on Pinterest
Check Out My Latest Recipes
- An Easy Cheese Quiche Recipe You Will Make Again and Again
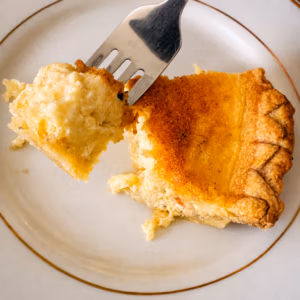 Creamy, rich, and surprisingly simple, this cheese quiche recipe is the kind of breakfast that feels elegant without requiring much effort. This three cheese quiche recipe is made with a frozen pie crust, a silky egg custard, and layers of melted cheese for a texture that feels downright luxurious. If you’ve ever wondered how to… Read more: An Easy Cheese Quiche Recipe You Will Make Again and Again
 - You Will Love This Easy Strawberry Shortcake Overnight Oats Recipe
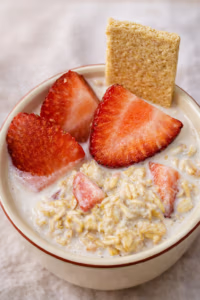 Some mornings call for coffee and quiet. Others demand something sweet enough to convince you to get out of bed at all. These strawberry shortcake overnight oats live somewhere perfectly in between — creamy, gently sweet, and layered with real strawberries and graham cracker crumble that make breakfast feel like dessert without tipping into indulgence… Read more: You Will Love This Easy Strawberry Shortcake Overnight Oats Recipe
 - You Will Love To Snack On These Easy Goat Cheese Stuffed Dates: Luxury Made Easy
 If you’ve never made stuffed dates before, this goat cheese-stuffed dates recipe will make you a believer. These little bites combine smoky bacon, creamy goat cheese, and the caramel sweetness of dates for a balance that’s downright addictive. Whether you serve them at a dinner party, a date night in, or just for yourself after… Read more: You Will Love To Snack On These Easy Goat Cheese Stuffed Dates: Luxury Made Easy
 - How to Make Pumpkin Pancakes with Sour Cream
 This pumpkin pancake recipe is soft, spiced, and full of flavor, made with real pumpkin purée and creamy sour cream for a texture that melts in your mouth. These easy pumpkin pancakes bring the warmth of fall to your breakfast table — balanced sweetness, perfect spice, and that irresistible golden finish. Whether you’re making brunch… Read more: How to Make Pumpkin Pancakes with Sour Cream
 - Effortless Tomato & Feta Breakfast Tart — A Recipe With A Love For Comfort Food
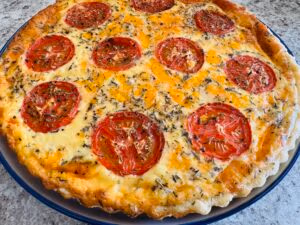 There’s a certain calm that fills the kitchen when you’re cooking just for yourself. The kind that hums quietly under the sound of a simmering kettle or the light crackle of butter on the stove. This tomato and feta breakfast tart came to life on one of those mornings — not for guests, not for… Read more: Effortless Tomato & Feta Breakfast Tart — A Recipe With A Love For Comfort Food
 - This Satisfying Apple Strudel Overnight Oats Will Be Your New Go-To
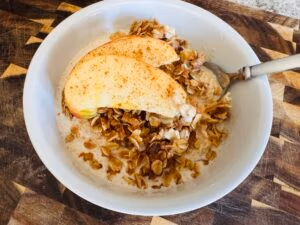 Imagine a breakfast that tastes like you snuck into a bakery at 7 a.m. and stole the freshest, warmest apple strudel off the tray — except it’s cold, creamy, and waiting in your fridge. That’s what this Apple Strudel Overnight Oats recipe is. A simple jar of oats, but dressed in cinnamon-spiced apples, sweet vanilla… Read more: This Satisfying Apple Strudel Overnight Oats Will Be Your New Go-To