Chocolate chip cookies that win over kids, impress veterans, and deliver bakery-style magic straight from your own oven.

Let me tell you something: the toughest chocolate chip cookie critics on the planet are kids…and veterans. Kids are savages. They will take your cookie, take one bite, and if it’s not hitting every single note, they will simply hand it back to you. My daughter has leveled up recently—she doesn’t just hand things back. No. She adds this dramatic “YACK!” sound effect that slices straight through your soul. If a cookie survives her, it’s a miracle.
And veterans? People assume veterans will eat anything. And yes, when you’re hungry, you absolutely will. But there’s something people on the outside don’t understand: soldiers are always longing for home. Always. So when we sit down with food—any food—we don’t just taste what’s in front of us. We taste moments and comfort. We taste things we used to rush through during short visits home, squeezing every favorite flavor into too few hours.
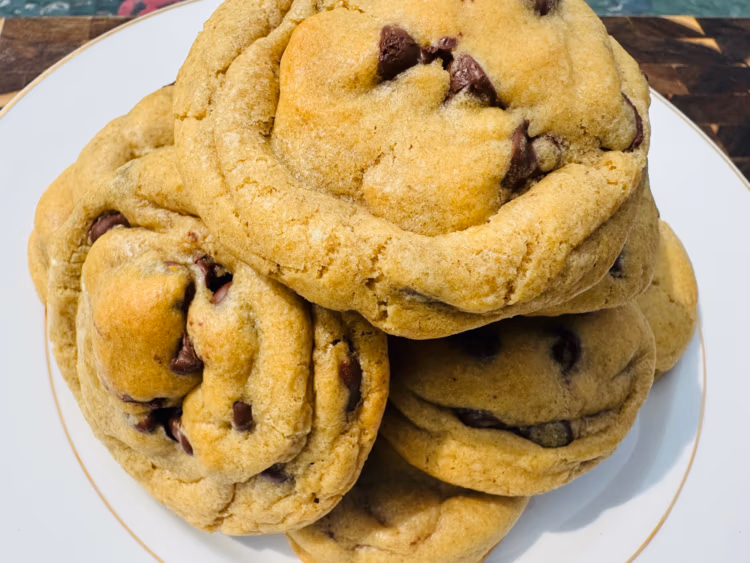
That’s why homemade hits different. Homemade carries intention, heart, and the feeling of “I’m home” The warm kitchen, the familiar smell, the tiny piece of normal you cling to. And these cookies? These cookies are homemade bakery-style perfection with all that heart folded right in. Thick. Chewy. Gooey. Deeply flavored. No unicorn powder required.
Why These Chocolate Chip Cookies Hit So Hard
I’ve baked a lot of chocolate chip cookies in my life. I have made the flat ones, the cakey ones, the crispy ones, the barely-there-chocolate ones, the “oh no… why did they spread like this?” ones, the “did I forget an ingredient?” ones, and of course—the ones that look gorgeous but taste like disappointment.
But these right here?
These are the cookies that make people pause. The cookies that make The cookies that survive child critics and make grown folk go grab a glass of milk.
They’re everything:
- Tall and thick
- Chewy in the center
- Crispy around the edges
- Caramelized in all the right spots
- Loaded with chocolate
- And made entirely with bread flour
That last part is what changes everything.
Making Cookies With Bread Flour
The heart of this recipe—the reason it looks bakery-perfect without needing a commercial oven—is bread flour.
Bread flour has a higher protein content compared to all-purpose flour. That extra protein gives your cookie dough structure, allowing it to hold its height instead of spreading into a thin little frisbee.
It makes the cookies:
- thicker
- taller
- chewier
- richer
- and slightly crispier at the edges
It’s the difference between a homemade science project cookie and that warm, indulgent, bakery-counter masterpiece. If you’ve ever wondered, “Why don’t my cookies look like the ones in the bakery window?” Bread flour is the answer. And once you switch? You will not want to go back.
The Ingredients That Make This Chocolate Chip Cookie Recipe Perfect
- 1 cup unsalted butter, softened
- ½ cup granulated sugar
- ½ cup light brown sugar
- ¼ cup dark brown sugar
- 2 large eggs
- 2 teaspoons vanilla extract
- 2 ¼ cups bread flour
- 1 teaspoon baking soda
- ½ teaspoon salt
- 2 cups semisweet chocolate chips
How to Make the Best Chocolate Chip Cookies
- Cream the butter u0026 sugars
Beat the butter, granulated sugar, light brown sugar, and dark brown sugar until fluffy.
- Add eggs u0026 vanilla
Beat until glossy and smooth.
- Mix the dry ingredients
Whisk together bread flour, baking soda, and salt.
- Combine
Add the dry ingredients into the wet and mix until just combined.
The dough will be thick — that’s what we want. - Fold in the chocolate chips
Two cups.
- Chill and shape
Chill the dough for one hour. Then, Scoop and form into cones onto a baking sheet.
- Bake and Enjoy
Bake at 350 for 10 – 12 minutes.
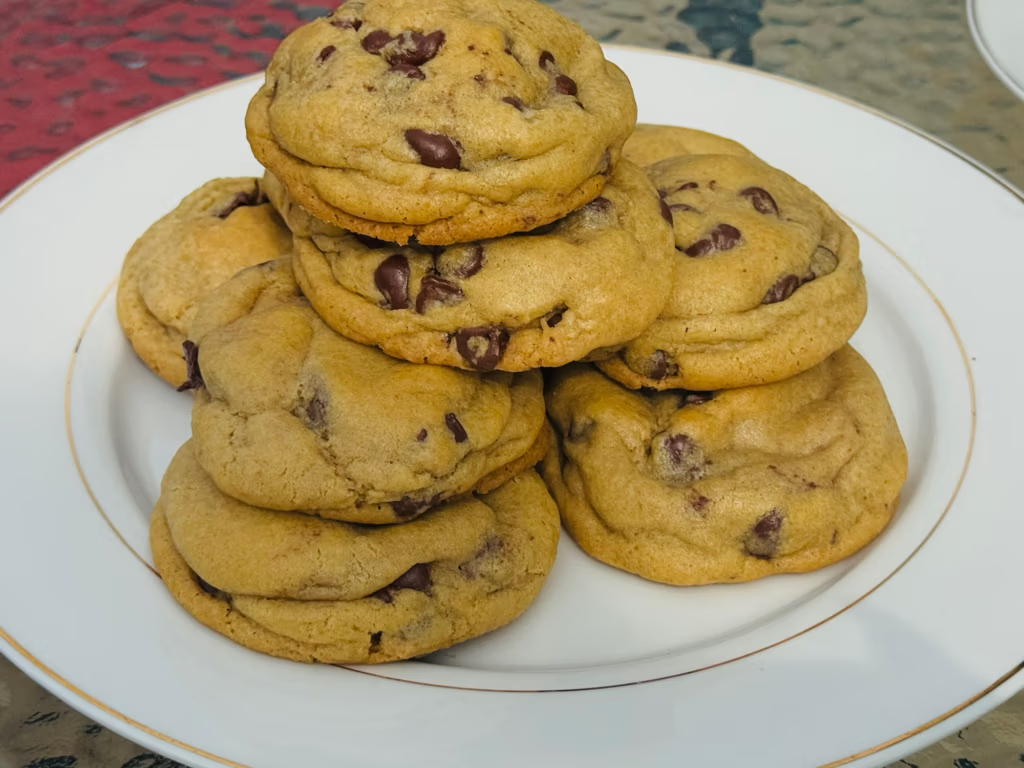
The Technique: Why Your Cookies Need a Cone Shape

When I scoop my cookie dough, I don’t make cute little disks. I make small cones—yes, actual cones.
Why? Because they bake up with:
- taller centers
- better chew
- thicker middles
- less spreading
- more rise
A cone shape allows the cookie to fall into itself as it bakes. So instead of a disk that spreads and thins out, you get a thick, voluptuous cookie with a tender, decadent bite. It’s the small details that add up. And these details give you that cookie.
Storage, Freezing, and Reheating
These cookies keep beautifully in an airtight container for up to five days.
You can freeze them baked for up to three months, or freeze the unbaked dough cones and bake them whenever the craving hits.
A quick 10-second zap in the microwave? Pure heaven.
Your Bread Flour Chocolate Chip Cookie Questions Answered
You can, but the texture changes completely. Bread flour is what gives these cookies their tall, chewy bakery height. All-purpose flour makes them flatter and softer.
No sir or ma’am. Pastry flour is too delicate. It’s meant for tender cake-like textures, not structured cookies. Your cookies will spread like melted ice cream.
Absolutely. Pecans, walnuts, or macadamias would be perfect. Just fold them in with the chocolate chips.
No, I’d be lying if I told you I chill the dough every single time. BUT IT IS HIGHLY RECOMMENDED. Chilling prevents spread, deepens the flavor, and gives you a chewier center.
Yes—mix and match however you like. These cookies are extremely flexible when it comes to chocolate.
Warm dough, warm butter, or not enough flour. Using bread flour and chilling the dough solves the problem almost every time.
If You Love These Cookies, Try These Next
- Caramel Turtle Cookies
- Chewy Oatmeal Cookies
- Browned Butter Peanut Butter Cookies
- Mini Cheesecake Bites
- Pull-Apart Monkey Bread
- and for something classic and cozy: Banana Nut Bread
Final Thoughts from Camille
Chocolate chip cookies are so much more than sugar, butter, and flour. They’re the treat kids judge honestly and veterans cherish deeply—because we know what it means to sit down with something that tastes familiar and peaceful. These cookies deliver that every single time.
If you bake these chocolate chip cookies, I’d love to see them! Tag me on Instagram @camillescomfortingcuisine or leave a comment below.
Don’t forget to subscribe! When you sign up, you’ll instantly get my free printable kitchen duo — a Meat Thermometer Temperature Guide and a Kitchen Ingredient Substitution Chart. If these cookies brought some joy to your home, you can Buy Me a Coffee to keep the goodness coming.
Here’s to fat, chunky cookies, clean plates, and the simple happiness of something fresh-baked and shared.
With love and crumbs,
Camille

Perfect Chocolate Chip Cookies
24
Cookies15
minutes10
minutes25
minutesCrisp on the edges, soft in the center—these chocolate chip cookies are buttery, chewy, and foolproof.
Keep the screen of your device on
Ingredients
1 cup unsalted butter, softened
1/2 cup granulated sugar (for crisp edges)
1/2 cup light brown sugar (for soft texture and mild molasses flavor)
1/4 cup dark brown sugar (for deep molasses flavor)
2 Eggs (large)
2 tsp pure vanilla extract
2 1/4 cup bread flour (for chewiness and less spread)
1 tsp baking soda
1/2 tsp salt
2 cups semi-sweet chocolate chips
Directions
- In a large mixing bowl, cream together the softened butter, granulated sugar, light brown sugar, and dark brown sugar until the mixture turns pale and fluffy.
- Add the eggs and vanilla extract to the bowl. Mix until everything is smooth and glossy.
- In a separate bowl, whisk together the bread flour, baking soda, and salt.
- Add the dry ingredients into the wet ingredients. Mix on low speed just until the flour disappears—don’t overmix.
- Fold in the chocolate chips gently so they’re evenly distributed throughout the dough.
- Cover the bowl and refrigerate the dough for at least 1 hour (overnight gives the best texture and height).
- Preheat your oven to 350°F. Lightly spray your baking sheet with baking spray (or line it with parchment if you prefer).
- Scoop a generous portion of chilled dough into your hands. Roll it into a ball, then gently shape that ball into a short cone—narrow at the top and wider at the bottom. This cone shape helps the cookies bake up thick, tall, and chewy instead of spreading flat.
- Place each dough cone on the baking sheet, leaving plenty of space between them. They will spread slightly but remain thick in the center.
- Bake until the edges turn golden brown but the centers still look a little soft, about 10–12 minutes depending on your oven and cookie size.
- Let the cookies cool on the baking sheet for a few minutes before transferring them to a rack. The centers will finish setting as they cool.
Camille’s Notes
- Check out my blog post so you can see how I shaped my dough cones!
Did you make this recipe?
Tag @camilles_comforting_cuisine on Instagram and hashtag it with
Like this recipe?
Follow camillescomfortingcuisine on Pinterest
Check Out My Latest Recipes
- Easy Homemade Flan: This Quietly Iconic Dessert is Unforgettable
 This easy flan recipe is silky smooth, lightly sweet, and crowned with a glossy layer of golden caramel that feels both nostalgic and elegant. Made with pantry staples and blended until effortless, this classic flan recipe proves that homemade flan doesn’t have to be complicated to be impressive. If you’ve ever wondered how to make… Read more: Easy Homemade Flan: This Quietly Iconic Dessert is Unforgettable
 - Everyone Will Love This Easy Layered Berries and Cream Dessert
 This easy berries and cream dessert is light, creamy, and bursting with fresh fruit flavor. Made with sweet berries, fluffy cream, and soft angel food cake, it’s the kind of no bake dessert that feels special without being fussy. If you’re looking for an easy berry and cream dessert that feeds a crowd and disappears… Read more: Everyone Will Love This Easy Layered Berries and Cream Dessert
 - How To Make A Moist Lemon Drizzle Cake from Scratch
 This moist lemon drizzle cake is soft, fluffy, and bursting with bright citrus flavour. We’re using real lemons, full-fat sour cream, and melted butter for maximum tenderness and taste. You’ll whisk everything by hand — no mixer, no fuss — and finish it off with a tart-sweet glaze that sinks into every golden crumb. If… Read more: How To Make A Moist Lemon Drizzle Cake from Scratch
 - How To Make An Easy Gooey Pull Apart Monkey Bread
 There’s a special kind of magic that happens on holiday mornings — the kind that smells like cinnamon, butter, and joy. The kind that wraps the whole house in warmth before the sun is even fully awake. This easy gooey pull apart monkey bread recipe is the definition of comfort in dessert form, and the… Read more: How To Make An Easy Gooey Pull Apart Monkey Bread
 - How To Make an Easy Pumpkin Cheesecake: The Creamy Fall Dessert You’ll Make Every Year
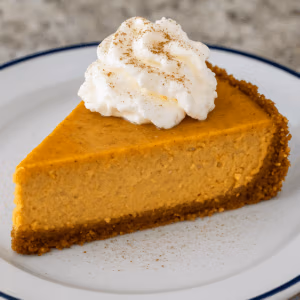 If fall had a flavor, it would taste like this easy pumpkin cheesecake — rich, velvety, and perfectly spiced. This homemade pumpkin cheesecake recipe gives you that classic New York-style texture with a cozy seasonal twist. Every bite is creamy and comforting, with a hint of cinnamon and a whisper of cloves that makes your… Read more: How To Make an Easy Pumpkin Cheesecake: The Creamy Fall Dessert You’ll Make Every Year
 - How To Make Classic Shortbread Cookies: The Ultimate Year Round Dessert
 If you’ve spent more than ten minutes on Camille’s Comforting Cuisine, then you may have already figured out that I really like cookies. Like, love cookies. I’m a picky cookie eater with a sweet tooth that knows what it wants. I’ve got soft chocolate chip cookies, chewy oatmeal cookies, peanut butter crisscross classics, and holiday… Read more: How To Make Classic Shortbread Cookies: The Ultimate Year Round Dessert